Connect to IoT Devices
Note, 23 Mar 2025: Docker images for ARM64 targets published on 21 Mar 2025 or later may encounter a startup issue that is likely caused by the underlying base image. We will push new images through once resolved. Should you encounter a start-up issue, then please specifically target the previous versions of relevant images in the meantime. We remove this message once the issue is resolved.
New! The IoT device connector for Dataristix makes it easy to exchange data with IoT devices available on your Raspberry Pi!
Dataristix® is a suite of software modules connecting disparate data sources and data sinks. Learn more about Dataristix.
The connector is based on Microsoft's .NET IoT library and so far integrates around 50 IoT devices that may be available on your Pi. We cannot test all devices, that's why the connector is marked "experimental". The good news is, it's free, either for personal use or with your commercial license.
Feedback wanted!
Going forward, we'll be adding more devices and features. If you have any problems or there is a device or feature you would like to see added sooner rather than later, then please contact us and we may be able to help. We value your feedback!
In the following article, we'll walk through the steps required to exchange some data with a Sense HAT for Raspberry Pi (conceptually it is the same for all IoT devices), and have included all Dataristix connector modules that are available free for personal use: CSV, E-Mail, Excel, IoT Devices, MQTT, Power BI, REST, Script, and SQLite. Following the example below, you will be able to exchange data with these modules out-of-the-box.
Requirements
The IoT device connector and other connector modules are available as ARM64 Docker containers. That means, you'll need a 64-bit operating system on your Pi to use the connector. Need 32-bit? Contact us. Please visit Docker Hub to explore all available containers for Dataristix.
You may be able to get away with a 1 GB Raspberry Pi for a setup with one or two connector modules and a limited number of tasks, but will probably need a 2 GB system or better for anything else. The example here uses nine connector modules. If you are running low on memory then you may want to remove modules that you don't need (more on this below).
For this example, you will also need the Sense HAT device installed.
Install Docker
To install Docker on your Raspberry Pi, please follow the official instructions here: https://docs.docker.com/engine/install/debian/
Docker Compose
Because each Dataristix connector module comes in its own container, we'll use "docker compose" to start an instance for our solution. We have also added a "docker compose override" file, configuring the container user as "root". You may want to review settings and configure a different user that has access to the required Dataristix volumes (please see Datarisix on Docker Hub for more information).
You can download the required files here:
docker-compose.yml
docker-compose.override.yml
If you are short on memory, then you may want to remove unwanted module references from the "docker-compose" and "docker-compose.override" files.
Place both files into a new folder on your Raspberry Pi, then run:
docker compose up --detach
"Detach" keeps the docker containers running even after you close the terminal window.
Allow some time for all connector modules to initialize. This may take a minute, depending on how powerful your Raspberry Pi is.
Open Browser
Access your Dataristix instance on the Raspberry Pi by browsing to http://localhost:8282 or point your browser to your Raspberry Pi on the network, i.e. at http://raspberrypi:8282.
You can see all installed modules by selecting the "Connectors" navigation node.

Configure IoT Device
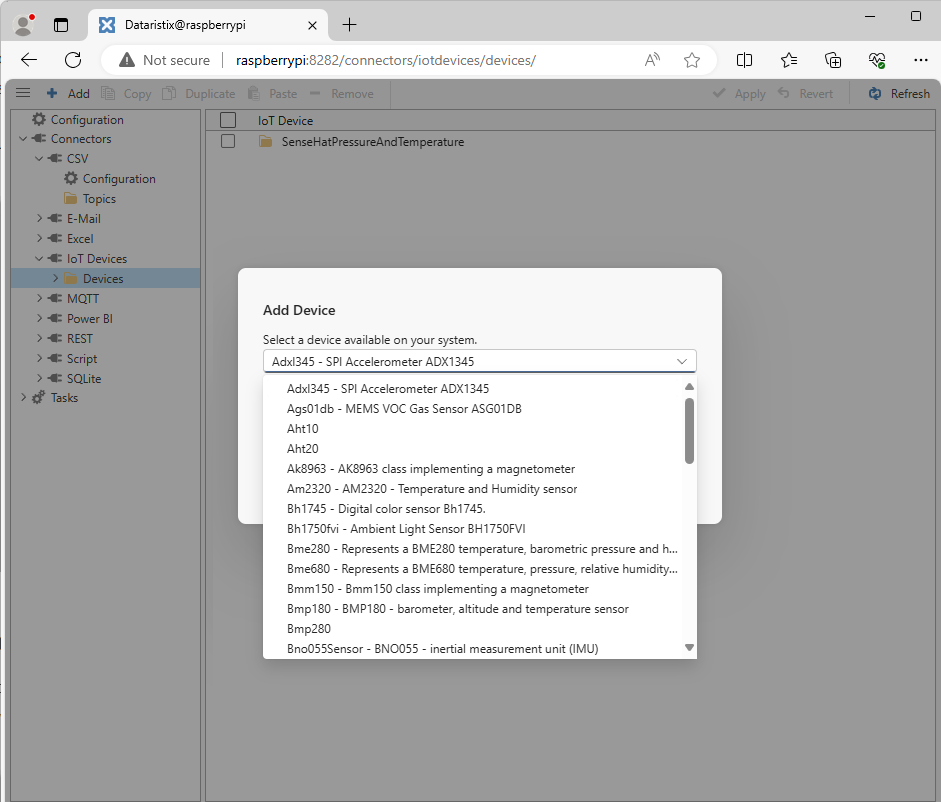
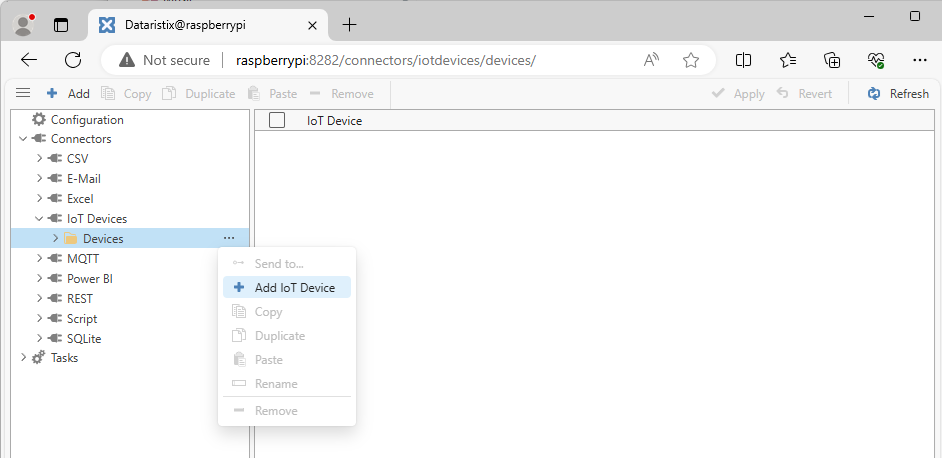
Expand the "Iot Devices" navigation node and right-click on "Devices" or click on the "..." menu icon next to it. Select "Add Device". Note that initial load times for the navigation node may vary, depending on the Raspberry Pi performance.
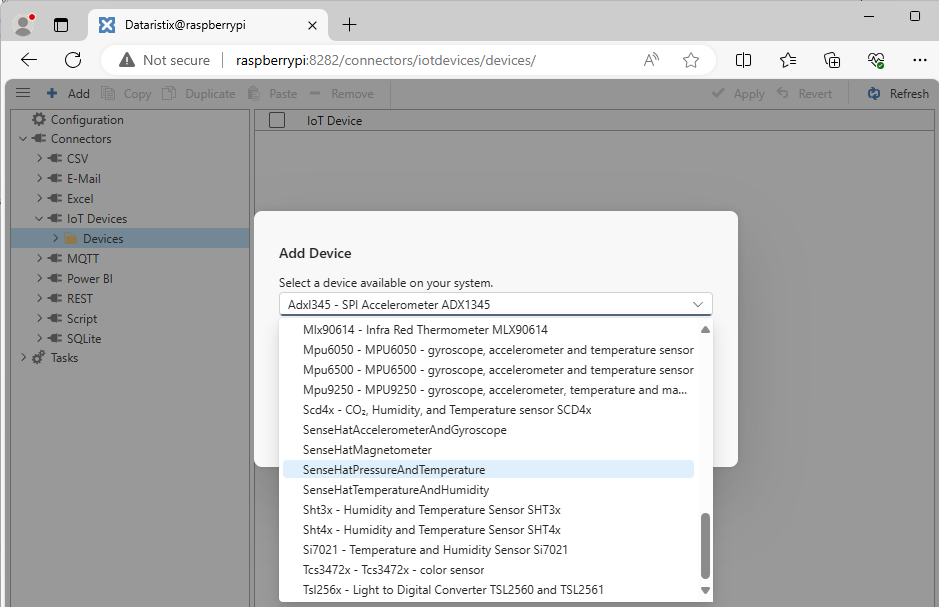
In the dialog, select "SenseHatPressureAndTemperature".
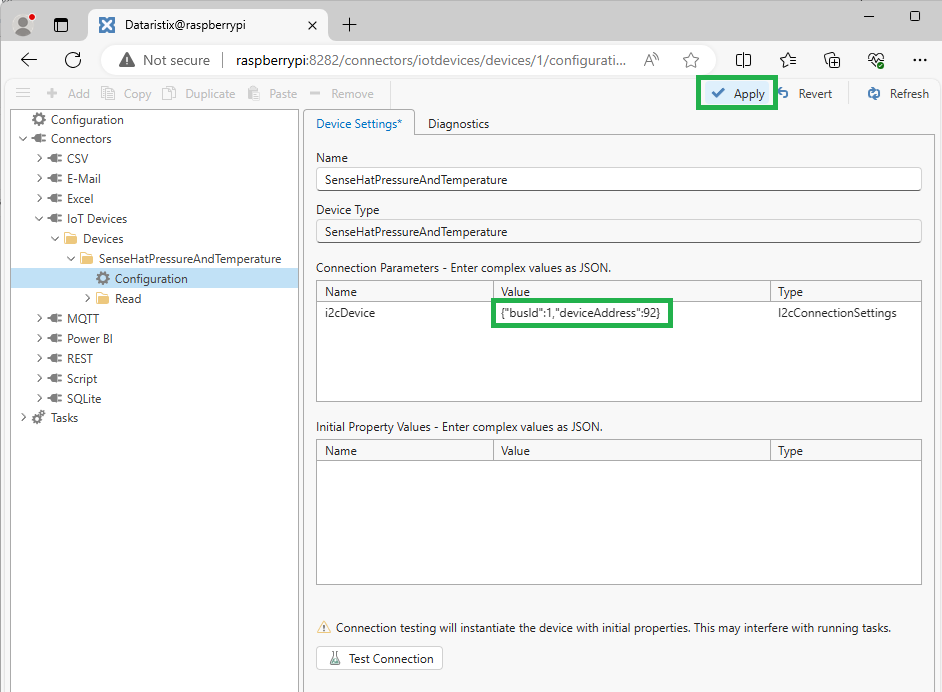
Select the "Configuration" node and update the bus ID and device address. The bus ID for the sensor is 1 and the device address is 92 in this case. Press "Apply" to confirm the configuration.
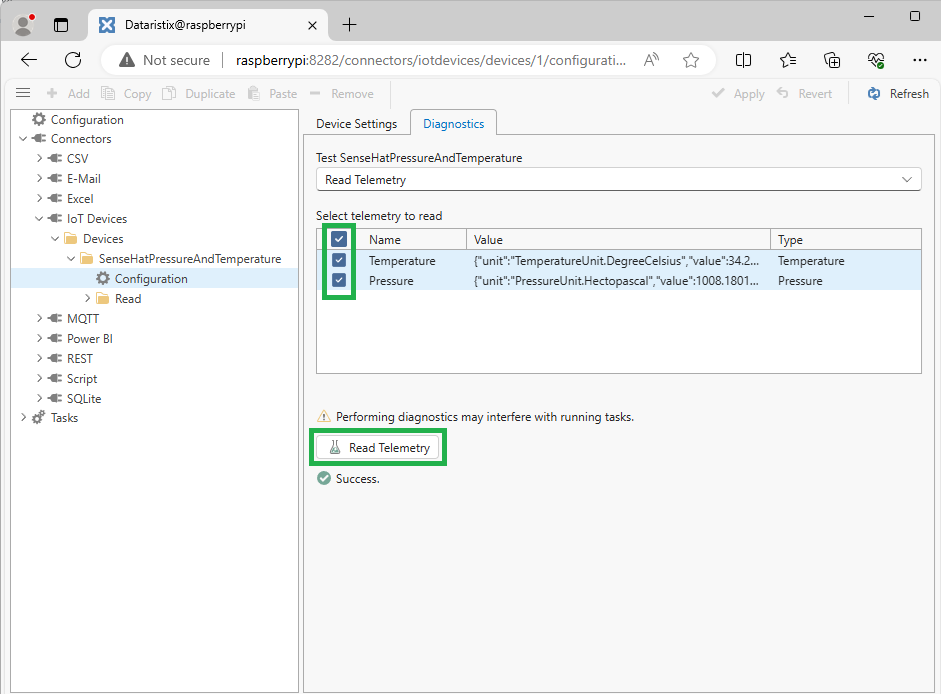
Move to the "Diagnostics" tab to confirm that data can be read successfully. Select some or all telemetry values to read, then click on "Read Telemetry". The result should be "Success" with values displayed in the data grid.
Configure IoT Device Topic
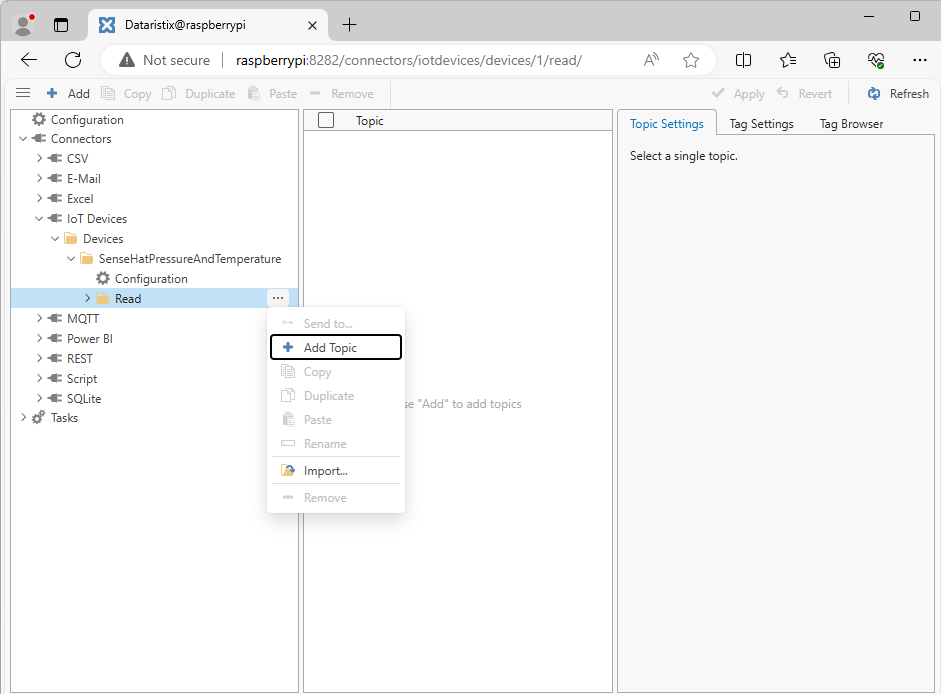
Like with all connectors for Dataristix, you first configure "Topics" determining what data to read or write. These topics are then available in Tasks. For the selected Sense HAT IoT device, right-click on the "Read" navigation node and add a topic that you can name anyway you like.
Here we'll name the topic "SenseHat Temperature and Pressure". Using the Tag Browser on the right, we add tags "Temperature" and "Pressure".
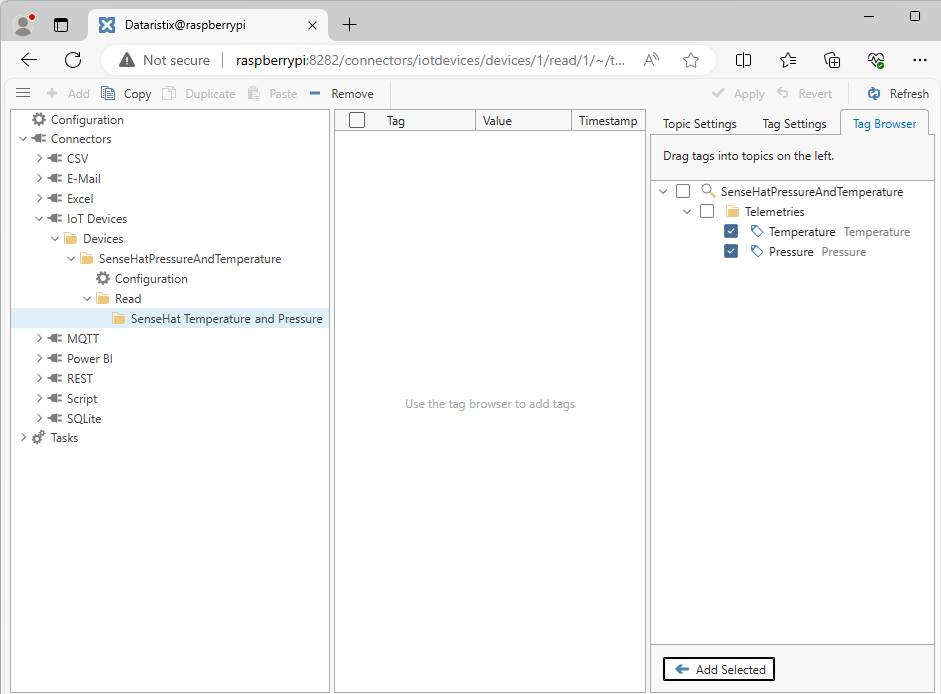
Use the "Topic Settings" to configure a poll rate for telemetry tags. We keep the default read rate of once per second. You'll now see the tag list populated with live values.

Add Task
Tasks define data processing logic to do something useful with the data provided by connectors. With the configured connectors you can:
- Store data into CSV files (comma-separated-value files). Learn more.
- Send an e-mail when something about the data changes. Learn more.
- Generate Excel reports or link live data into Excel spreadsheets. Learn more.
- Exchange data with an MQTT broker or send data to an IoT provider in the cloud. Learn more.
- Send data to Power BI. Learn more.
- Exchange data with REST services. Learn more.
- Customize task logic with JavaScript. Learn more.
- Exchange data with SQLite databases. Learn more.
Additional connectors are available as commercial offerings.
Here we'll add a simple example that stores data into a CSV file (Comma Separated Value file) using the Connector for CSV whenever a deadband value is exceeded.
Before we can send data to CSV files, we'll also need to configure a topic for the CSV Connector. Right-click on the "Topics" navigation node for the CSV Connector, then "Add Topic". You can keep the default settings for the topic or adjust to suit.

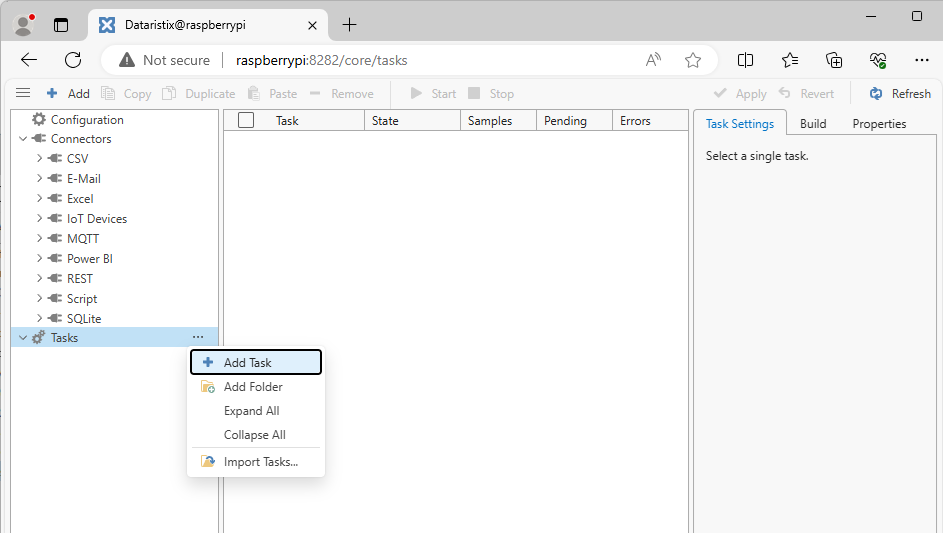
To add a task, right-click on the "Task" navigation node and select "Add Task".
Name the task anyway you like. Here we call it "SenseHat to CSV".
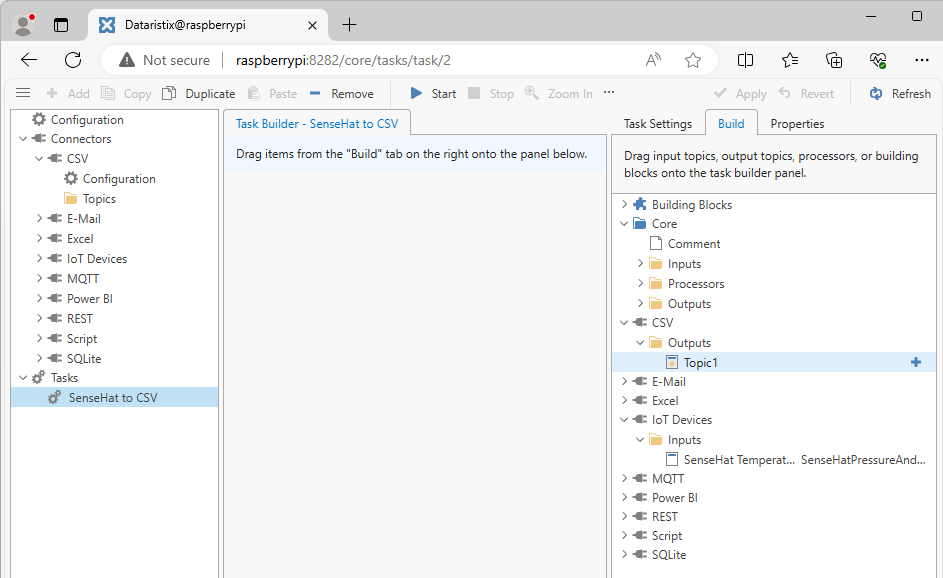
From the "Build" tab on the right, we'll add the "Topic1" CSV connector topic that we have just created, and also the "SenseHat Temperature and Pressure" topic created earlier. Additionally, we need a JSON Decoder processor because temperature and pressure values are JSON objects that include value and unit. Finally we add a "Deadband Processor" to avoid excessive logging. You can find the Deadband Processor under "Core / Processors / General" in the Build tab; the JSON Decoder is under "Core / Processors / Decode".
Click on the JSON Decoder in the Task Builder panel and enter "unit" and "value" as property names to be extracted:
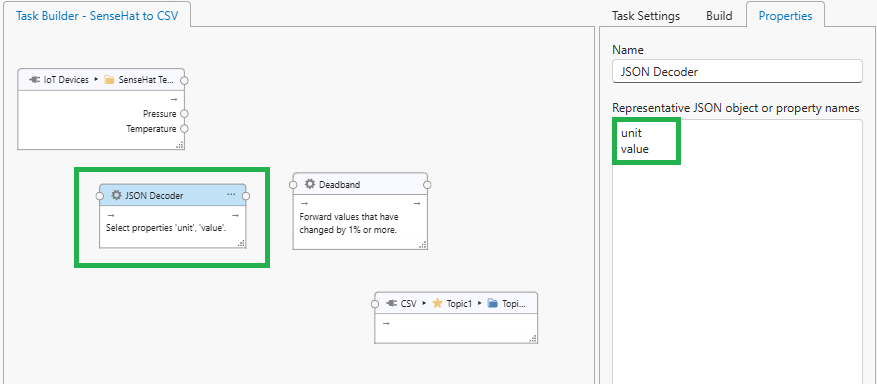
Arrange the task nodes in the Task Builder panel, then connect tags from the SenseHat topic via the JSON Decoder and Deadband processor to the CSV topic. You can connect multiple tags or single tags by dragging from the Topic Connection Points or Tag Connection Points. Your task may look like this:
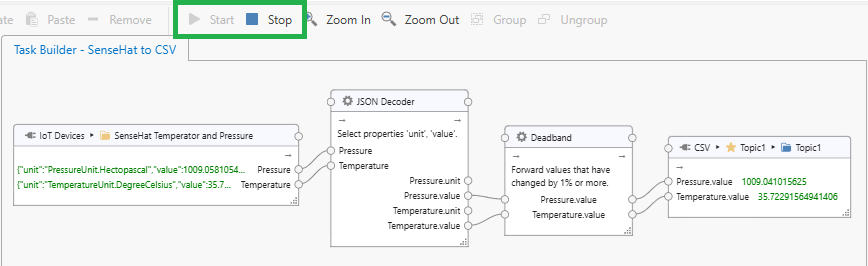
Use the "Start" button in the toolbar to begin data processing and the "Stop" button to end it. Because Dataristix runs as a background service on your Raspberry Pi, data processing continues even after you close the browser window.
In the above task we don't do anything with the temperature unit or pressure unit, but if required then you can store these as well by connecting the unit tags to the CSV task node.
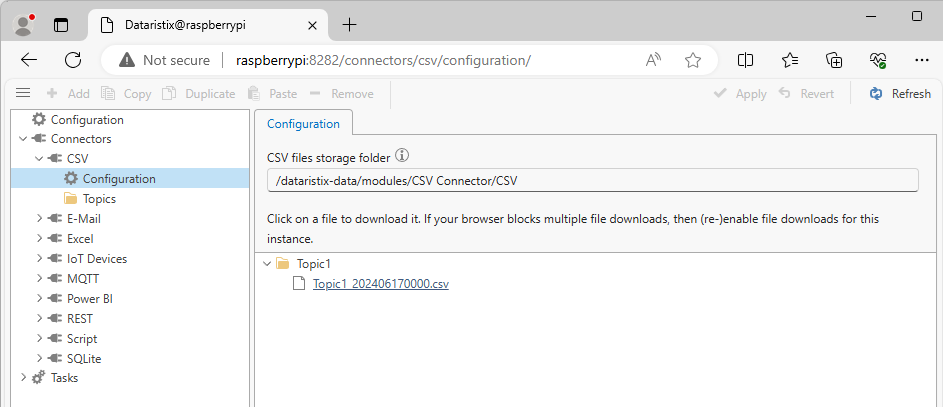
Go to the CSV node in the navigation tree and select the "Configuration" tab to view or download CSV files.
Tips
Be patient when initially accessing navigation nodes. The Raspberry Pi may need some time to load code and data. The faster your Pi, the smoother the experience. Use the "Refresh" toolbar button if loading fails on the first attempt.